I was doing some testing of the new vSphere 5.1 features and came across something odd with the new Distributed Switch Health Check feature with Cisco UCS.
Tag Archives: vmware
Custom ESXi 5 ISO for UCS, Nexus 1000v and PowerPath VE
With ESXi 5 VMware made it very easy to create custom installation ISOs. I have been doing a lot of upgrades from ESXi 4.1 in our customer sites that have UCS, Nexus 1000v and PowerPath VE so I decided to create a custom ISO that includes the current UCS enic/fnic drivers and Nexus 1000v/PowerPath VE.
When I first started doing these upgrades I would remove the host from the Nexus 1000v VDS, uninstall Nexus 1000v VEM and uninstall PowerPath VE. After upgrading/rebuilding the host I would then use VUM to install Nexus 1000v VEM add it back to the VDS and then install PowerPath VE.
ESXi 4.1 to 5 Upgrades with VUM
I have been doing a lot of ESXi 4.1 to 5 upgrades of late and every time I tried using vCenter Update Manager I would get an incompatible driver warning for these 2 ESXi 4.1 driver packages
- oem-vmware-esx-drivers-scsi-3w-9xxx
- oem-vmware-esx-drivers-net-vxge
VMware SRM Testing on Cisco UCS with Routing
I work for a Cisco/EMC/VMware VAR named Varrow and we do a fair amount of VMware SRM projects.
One of the challenges we face in doing SRM failover testing is being able to route between VMs that are brought up at the recovery site in a test bubble. Not all of our customers that use SRM need to be able to test this as a lot of them just need to verify that the VMs boot and can access storage.
For the few that need to be able to do more extensive testing and need to be able to route between VMs on different VLANs we have come up with a simple solution.
This solution will work in any VMware environment but when the customer has Cisco UCS at their recovery site there are additional benefits and functionalities that can be realized.
The solution utilizes a free VM router appliance from Vyatta and can be downloaded from the VMware Virtual Appliance Market – http://www.vmware.com/appliances/directory/va/383813
The advantage you get when you have Cisco UCS at the recovery site is that you can easily create a new vNIC and the way the layer 2 switching works within UCS allows you to be able to route between VMs across multiple ESX hosts.
For non-UCS environments it will not be possible to route between VM on different ESX hosts without some additional hardware; pNIC and L2 switch.
To test this out in our lab here are the steps I followed:
- Created 3 new test VLANs that only exist in UCS. It is important that these VLANs do not exist on your northbound layer switch.

- Created a new vNIC template in UCS Manager named vmnic8-srm-b and added it to my ESXi Service Profile Template. This vNIC is configured to use Fabric B as primary but with failover enabled so that if B is down it will failover to A. I normally configure 2 vNICs per VMware vSwitch and let VMware handle the failover but with this solution I needed a vSwitch with only 1 uplink so that routing between VMs across multiple ESX host could be achieved.

- After a reboot of my UCS hosted ESXi host the new vmnic8 was present

- Created a new vSwitch and uplinked vmnic8 to it.
- Created 3 new VM port groups on the new vSwitch; one for each test VLAN.

- Imported the Vyatta OVF into vCenter and placed the 3 default vNICs into each of the new port groups.

- Powered on the Vyatta VM and logged into the console as root with the default password of vyatta.
- Configured the 3 Ethernet interfaces using these commands


configure
set interfaces ethernet eth0 address 10.120.10.254/24
set interfaces ethernet eth0 description “VLAN-120-SRM-TEST”
set interfaces ethernet eth1 address 10.130.17.253/24
set interfaces ethernet eth1 description “VLAN-117-SRM-TEST
set interfaces ethernet eth2 address 10.13.7.245/24
set interfaces ethernet eth2 description “VLAN-107-SRM-TEST”
commit
save
After the interface configuration I issued these commands to verify configuration and routing

From my 2 test VMs I was then able to ping between them across ESXi hosts

Cisco UCS Service Profile Coolness
Last week I did a Cisco UCS project that included building out a new VMware vSphere ESXi 4.1 cluster using the new UCS blades. Now that ESXi boot from SAN is supported we used 5GB boot LUNs for the install.
During the course of the install the customer stated that in a few weeks they will be purchasing another chassis of blades and will be using these for additional ESXi 4.1 hosts. To demonstrate the power of the UCS stateless model I went ahead and provisioned all 8 of the new ESXi hosts even though the hardware did not exist.
Sounds like a magic trick right? Well sort of, but using the power of UCS Service Profiles and boot from SAN here is how we accomplished this:
- Built out the UCS Service Profiles for the hosts from the Service Profile template.
- Put 4 of the new ESXi hosts into maintenance mode and powered them down.
- Disassociated the service profiles from those 4 blades.
- Using these 4 free blades we associated them with 4 of the Service Profiles for the hardware that did not yet exist.
- Created the boot LUNs
- Installed ESXi 4.1.
- Added the hosts to vCenter.
- Applied our vSphere Host Profile to configure the new hosts.
- Powered down the 4 new servers.
- Pre-built the next 4 the same way.
- Powered those down and associated the original service profiles with the 4 blades.
Now when the customers gets the new chassis and blades all they have to do is associate the service profiles and they are done.
VMware vCenter 4.1 Upgrade/Migration Gotchas
I have recently been doing vCenter 2.5/4.0 to vCenter 4.1 upgrades and migrations for our clients. Upgrades to 4.1 have been more difficult than doing upgrades to 4.0 because vCenter 4.1 requires an x64 version of Windows.
Most of our clients that are on vCenter 2.5 are running it on 32-bit versions of Windows with most of those being Windows 2003.
For these migrations we have mostly been building new Windows 2008 R2 virtual machines and using the new vCenter Data Migration tool – Migrating an existing vCenter Server database to 4.1 using the Data Migration Tool
The data migration tool is handy for backing up the SSL certificates and registry settings from the vCenter 2.5 server and then restoring those to the new vCenter 4.1 server. The tool will also backup and restore SQL Express databases but most of our clients are running full SQL.
On my most recent upgrade/migration I ran into an SQL issue that I hadn’t seen before. In this case the client was running SQL 2005 as their database server for vCenter 2.5. Since they were already running SQL 2005 we didn’t see the need to move the database or upgrade SQL since 2005 is supported by vCenter 4.1.
During the install of vCenter 4.1 the database upgrade processes started as normal but then about 5 minutes into it we received this error “Exception Thrown while executing SQL script” and the install was halted. We immediately looked at the vCenter install log (vminst.log) to investigate what happened. The log had some additional SQL logging information but nothing specific so I then Googled the exception message and the first link in the search results was just what I was looking for.
The issue was due to the fact that the vCenter database was set to SQL 2000 compatibility mode. The reason it was set like this is because this server was originally SQL 2000 and then upgraded to SQL 2005.
The fix wasn’t as easy as just changing the database to SQL 2005 compatibility because the failed upgrade left the database in an inconsistent state. To correct the issue we first had to restore the database from the backup we made before the upgrade and then change the compatibility mode to 2005.
The other issue we ran into was more of an annoyance than an issue. After upgrading vCenter to 4.1 and installing vCenter Converter we noticed this error in the vCenter Service Status tool “Unable to retrieve health data from https://<VC servername or IP address>/converter/health.xml”. A quick Google search led us to the fix for this. – vCenter Service Status displays an error for com.vmware.converter
Sample script for automating the installation of ESXi 4.1 on Cisco UCS with UDA
Thanks to Mike Laverick the Ultimate Deployment Appliance now supports ESXi 4.1. – http://www.rtfm-ed.co.uk/vmware-content/ultimate-da/
I developed a script for automating the installation of ESXi 4.1 on Cisco UCS boot from SAN. The UDA template I setup uses a subtemplate for the host names, management IP and vMotion IP.
Here is my configuration:
- 6 GB Boot LUN hosted on an EMC CX4
- Cisco UCS B200-M1 blades
- Cisco VIC (Palo) adapters
- These vNICs

And these vHBAs

Here is the subtemplate I am using
SUBTEMPLATE;IPADDR;HOSTNAME;VMOTIONIP
UCSESX1;10.150.15.11;ucsesx1;10.150.12.11
UCSESX2;10.150.15.12;ucsesx2;10.150.12.12
Here is the script I am using
accepteula
rootpw –iscrypted $1$NvqID7HA$mkw26HiBQgbso6jk1jX014
clearpart –alldrives –overwritevmfs
autopart –firstdisk=fnic –overwritevmfs
reboot
install url http://[UDA_IPADDR]/[OS]/[FLAVOR]
network –bootproto=static –ip=[IPADDR] –gateway=10.150.15.254 –nameserver=10.150.7.3 –netmask=255.255.255.0 –hostname=[HOSTNAME].domain.com –addvmportgroup=0
%firstboot –unsupported –interpreter=busybox
#Set DNS
vim-cmd hostsvc/net/dns_set –ip-addresses=10.150.7.3,10.150.7.2
#Add pNIC vmnic1 to vSwitch0
esxcfg-vswitch -L vmnic1 vSwitch0
#Add new vSwitch for vMotion
esxcfg-vswitch -a vSwitch1
#Add vMotion Portgroup to vSwitch1
esxcfg-vswitch -A vMotion vSwitch1
#Add pNIC vmnic2 to vSwitch1
esxcfg-vswitch -L vmnic2 vSwitch1
#Add pNIC vmnic3 to vSwitch1
esxcfg-vswitch -L vmnic3 vSwitch1
#Assign ip address to vMotion vmk1
esxcfg-vmknic -a -i [VMOTIONIP] -n 255.255.255.0 -p vMotion
#Assign VLAN to vMotion PortGroup
esxcfg-vswitch -v 12 -p vMotion vSwitch1
#Enable CDP listen and advertise
esxcfg-vswitch -B both vSwitch0
esxcfg-vswitch -B both vSwitch1
sleep 5
#Enable vMotion to vmk1
vim-cmd hostsvc/vmotion/vnic_set vmk1
#Set NIC order policy for vMotion port groups
vim-cmd hostsvc/net/vswitch_setpolicy –nicorderpolicy-active=vmnic3 –nicorderpolicy-standby=vmnic2 vSwitch1
#enable TechSupportModes
vim-cmd hostsvc/enable_remote_tsm
vim-cmd hostsvc/start_remote_tsm
vim-cmd hostsvc/enable_local_tsm
vim-cmd hostsvc/start_local_tsm
vim-cmd hostsvc/net/refresh
# NTP time config
echo restrict default kod nomodify notrap noquerynopeer > /etc/ntp.conf
echo restrict 127.0.0.1 >> /etc/ntp.conf
echo server 0.vmware.pool.ntp.org >> /etc/ntp.conf
echo server 2.vmware.pool.net.org >> /etc/ntp.conf
echo driftfile /var/lib/ntp/drift >> /etc/ntp.conf
/sbin/chkconfig –-level 345 ntpd on
/etc/init.d/ntpd stop
/etc/init.d/ntpd start
#One final reboot
reboot
The four additional vNICs will be used as uplinks to the Cisco Nexus 1000v dvSwitch.

Cisco UCS Palo and EMC PowerPath VE Incompatibility
******UPDATE****** There is a new VMware driver out that corrects this incompatibility. You can download it here – http://downloads.vmware.com/d/details/esx40_cisco_cna_v110110a/ZHcqYmRwKmViZHdlZQ
I came across a much unexpected incompatibility this week between Cisco UCS VIC M81KR (Palo) and PowerPath VE.
I was implementing Cisco Nexus 1000v and EMC PowerPath VE on Cisco UCS blades with the new Cisco UCS VIC M81KR Virtual Interface Card (Palo). We did the Nexus 1000v implementation first and that went flawlessly. Being able to present 4 10G vNICs to the UCS blade with Palo makes for a very easy and trouble free Nexus 1000v install because you don’t have to put the ESX Service Console in the Nexus 1000v vNetwork Distributed Switch.
After the Nexus 1000v was complete we moved on to PowerPath V/E. This environment was already using PowerPath VE on their other UCS blades but those have the Menlo mezzanine cards with the QLogic HBA chip set. We were expecting this piece of the project to be the easiest because with PowerPath V/E you install it on each ESX host, license it and then that is it. There is zero configuration with PowerPath VE on ESX.
So we downloaded the latest PowerPath VE build from Powerlink (5.4 sp1). We then configured an internal vCenter Update Manager patch repository so that we could deploy PowerPath V/E with VUM. After we deployed PowerPath VE to the first host we noticed in the vSphere client that the LUNs were still owned by NMP. At first I thought maybe it was because it wasn’t licensed yet but then I remembered on the other PowerPath VE installs I did that PowerPath should already own the SAN LUNs.
I SSHed into the host and looked at the vmkwarning log file and sure enough there were lots of these warnings and errors.
WARNING: ScsiClaimrule: 709: Path vmhba2:C0:T1:L20 is claimed by plugin NMP, but current claimrule number 250 indicates that it should be claimed by plugin PowerPath.
vmkernel: 0:00:00:50.369 cpu8:4242)ALERT: PowerPath: EmcpEsxLogEvent: Error:emcp:MpxEsxPathClaim: MpxRecognize failed
It took us a few minutes but then we realized it was probably an incompatibility between Palo and PowerPath VE. We opened both a Cisco TAC and EMC support case on the issue and sure enough there is an incompatibility between the current ESX Palo driver and PowerPath VE. Cisco TAC provided us a beta updated fnic ESX driver for us to test but said that it wasn’t production ready.
We tested the new driver and that fixed the issue. PowerPath VE was then able to claim the SAN LUNs. Since the driver is beta and not fully tested by VMware we are going to hold off using it. Cisco didn’t give us date as to when the driver would be released. I imagine that once VMware gives it their blessing they will post it to the vCenter Update manager repository and it can be installed from there. Cisco may even have it out sooner as a single driver download from their UCS downloads page.
Since both the UCS Palo and PowerPath VE are part of vBlock I am very surprised this wasn’t already tested by Cisco, VMware and EMC. Oh well I know Cisco will have this fixed soon so it isn’t that big of a deal.
How to Enable CDP On Cisco UCS vNICs
If you are familiar with managing VMware ESX 3.5/4.x in an environment that includes Cisco LAN switches then you have probably used “CDP listen state” that is enabled by default on an ESX install. To view this information in vCenter select an ESX host, go to the configuration tab in the right pane, select the Networking link and then click on the little blue call out box next to a vmnic that is uplinked to a vSwitch. A pop-up window opens displaying the CDP information. The information can be invaluable when troubleshooting networking issues. You can determine which switch/switch port the NIC is plugged into, native VLAN and other useful information. This is also a great way to verify that your vSwitch uplinks are going to 2 different physical switches (if you have that option).

As I stated earlier the default CDP configuration on an ESX vSwitch is the listen only state. I have found that the network engineers find it very useful if you configure CDP to advertise as well. When you enable this on a vSwitch the network engineer can issue the “show cdp neighbors” command from the IOS command line and witch switch ports each ESX vmnic is plugged into. This can also be very useful when you and the network engineer are troubleshooting network issues with ESX.
![]()
To configure CDP to advertise run this command from the ESX console or from an SSH session.
“esxcfg-vswitch -B both vSwitch0”
To check the state of the CDP configuration run this command..
“esxcfg-vswitch -b vSwitch0”
Note – you must enable CDP on all vSwitches if you want to see every vmnic from the switch side.
If you are using a VMware vNetwork Distributed Switch then you can configure the CDP state from the vCenter GUI. To do this go to the edit settings on the dvSwitch and then go to Advanced.

Ok, now to the point of configuring all of this on Cisco UCS blades.
By default the vNICs in Cisco UCS have CDP listen and advertise turned off. You can see this from an ESX host that is running on a UCS blade by clicking on the little blue call out box. When the pop-up opens it states that Cisco Discovery Protocol is not available.

To enable CDP the first thing you must do is to create a new Network Control policy. To do this go to the LAN tab in UCSM, expand Policies, right-click Network Control Policies to create a new policy. Name it something like “Enable-CDP” and select the option to enable CDP.

The next step is to apply the new policy to the ESX vNICs. If you are using updating vNIC templates then all you need to do is go to each vNIC template for your ESX vNICs select the new policy from the Network Control Policy drop down. If you are not using vNIC templates but you are using an updating Service Profile Template then you can enable it there. If you are using one-off Service Profiles are a non-updating Service Profile then you must go to every Service Profile and enable this new policy on every vNIC.

Now when you click the call-out box you should see the CDP information coming from the Fabric Interconnect that you are plugged into.

Cisco UCS VN-Link Hardware Implementation Walk Through
Here is another video blog on Cisco UCS. In this video I walk through the implementation of VMware VN-Link in hardware on the Cisco UCS VIC (Palo) adapter.
http://www.screencast.com/t/YWU3ZGVmYzAt
Command line output of the ESX configuration
esxupdate query
—-Bulletin ID—- —–Installed—– ————Summary————-
ESX400-Update01 2010-03-25T22:03:33 VMware ESX 4.0 Complete Update 1
VEM400-200912272-BG 2010-03-25T22:35:03 Cisco Nexus 1000V 4.0(4)SV1(2)
vem version
Package vssnet-esx4.1.0-00000-release
Version 4.0.4.1.2.0.80-1.9.179
Build 179
Date Wed Dec 9 08:13:45 PST 2009
vem status
VEM modules are loaded
Switch Name Num Ports Used Ports Configured Ports MTU Uplinks
vSwitch0 32 4 32 1500 vmnic0,vmnic1
DVS Name Num Ports Used Ports Configured Ports Uplinks
UCS-dvSwitch0 256 230 256 vmnic3,vmnic2
VEM Agent (vemdpa) is running
esxcfg-vswitch -l
Switch Name Num Ports Used Ports Configured Ports MTU Uplinks
vSwitch0 32 4 32 1500 vmnic0,vmnic1
PortGroup Name VLAN ID Used Ports Uplinks
Service Console 0 1 vmnic0,vmnic1
DVS Name Num Ports Used Ports Configured Ports Uplinks
UCS-dvSwitch0 256 230 256 vmnic3,vmnic2
DVPort ID In Use Client
1628 1 vmnic2
1629 1 vmnic3
1630 0
1631 0
esxcfg-nics -l
Name PCI Driver Link Speed Duplex MAC Address MTU Description
vmnic0 08:00.00 enic Up 10000Mbps Full 00:25:b5:0c:95:a9 1500 Cisco Systems Inc 10G Ethernet NIC
vmnic1 09:00.00 enic Up 10000Mbps Full 00:25:b5:0c:95:ba 1500 Cisco Systems Inc 10G Ethernet NIC
vmnic2 0a:00.00 enic Up 10000Mbps Full 00:25:b5:0c:95:aa 1500 Cisco Systems Inc 10G Ethernet NIC
vmnic3 0b:00.00 enic Up 10000Mbps Full 00:25:b5:0c:95:bb 1500 Cisco Systems Inc 10G Ethernet NIC
lspci | egrep -i “cisco.*pass”
0c:00.0 Ethernet controller: Cisco Systems Inc 10G Ethernet pass-thru NIC (rev a2)
0d:00.0 Ethernet controller: Cisco Systems Inc 10G Ethernet pass-thru NIC (rev a2)
0e:00.0 Ethernet controller: Cisco Systems Inc 10G Ethernet pass-thru NIC (rev a2)
0f:00.0 Ethernet controller: Cisco Systems Inc 10G Ethernet pass-thru NIC (rev a2)
10:00.0 Ethernet controller: Cisco Systems Inc 10G Ethernet pass-thru NIC (rev a2)
11:00.0 Ethernet controller: Cisco Systems Inc 10G Ethernet pass-thru NIC (rev a2)
12:00.0 Ethernet controller: Cisco Systems Inc 10G Ethernet pass-thru NIC (rev a2)
13:00.0 Ethernet controller: Cisco Systems Inc 10G Ethernet pass-thru NIC (rev a2)
14:00.0 Ethernet controller: Cisco Systems Inc 10G Ethernet pass-thru NIC (rev a2)
15:00.0 Ethernet controller: Cisco Systems Inc 10G Ethernet pass-thru NIC (rev a2)
16:00.0 Ethernet controller: Cisco Systems Inc 10G Ethernet pass-thru NIC (rev a2)
17:00.0 Ethernet controller: Cisco Systems Inc 10G Ethernet pass-thru NIC (rev a2)
18:00.0 Ethernet controller: Cisco Systems Inc 10G Ethernet pass-thru NIC (rev a2)
19:00.0 Ethernet controller: Cisco Systems Inc 10G Ethernet pass-thru NIC (rev a2)
1a:00.0 Ethernet controller: Cisco Systems Inc 10G Ethernet pass-thru NIC (rev a2)
1b:00.0 Ethernet controller: Cisco Systems Inc 10G Ethernet pass-thru NIC (rev a2)
1c:00.0 Ethernet controller: Cisco Systems Inc 10G Ethernet pass-thru NIC (rev a2)
1d:00.0 Ethernet controller: Cisco Systems Inc 10G Ethernet pass-thru NIC (rev a2)
1e:00.0 Ethernet controller: Cisco Systems Inc 10G Ethernet pass-thru NIC (rev a2)
1f:00.0 Ethernet controller: Cisco Systems Inc 10G Ethernet pass-thru NIC (rev a2)
20:00.0 Ethernet controller: Cisco Systems Inc 10G Ethernet pass-thru NIC (rev a2)
21:00.0 Ethernet controller: Cisco Systems Inc 10G Ethernet pass-thru NIC (rev a2)
22:00.0 Ethernet controller: Cisco Systems Inc 10G Ethernet pass-thru NIC (rev a2)
23:00.0 Ethernet controller: Cisco Systems Inc 10G Ethernet pass-thru NIC (rev a2)
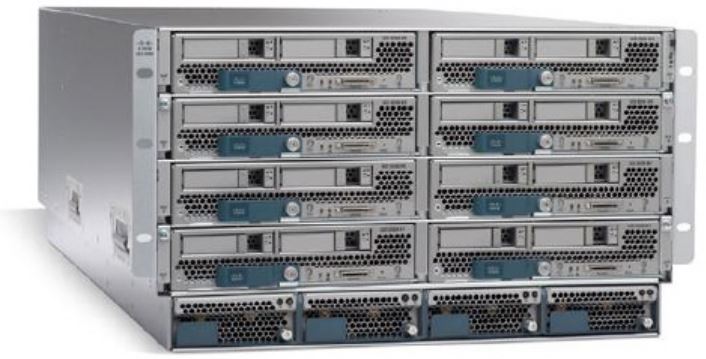
Presenting 4 vNICs to VMware ESXi 4 with the Cisco UCS VIC (Palo) Adapter
We got our own Cisco UCS lab at the office last week complete with two 6210S, two server blades and the new Cisco VIC (Palo) adapter.
Here is a diagram I copied from the Chassis 1 –> Hybrid Display tab in UCS Manager.

What is not in the diagram are two Cisco MDS 9124s and a Cisco 3750E with two Ten Gigabit uplinks.
After we got our first ESXi 4.1 blade up booting from a CX4-120 LUN I was itching to present more than two 10GB adapters to the ESXi host.
When I initially looked at how to add more than two vNICs to a Service Profile I couldn’t figure out how to do it. I was thinking there was some new configuration screen somewhere where you had to go to and enable the additional vNICs. I was also unable to find any good documentation on how to do it so a posted a question to the Unified Computing Cisco Support Community – https://supportforums.cisco.com/community/netpro/data-center/unified-computing?view=discussions&start=0
If you haven’t checked out this community and you are interested in Cisco UCS you should definitely browse through it. There are some good tips in there.
This is a very active community and the two times I posted a question it was answered within 12 hours.
I posted a question on how to configure the new VIC (Palo) adapter and to my surprise it is a lot easier to configure than what I initially thought.
All that I had to was add two more vNICs to my Service Profile template. I don’t know why I didn’t just try that first.
I went into my updating Service Profile Template and added eth2 to fabric A and eth3 to fabric B, here is a screen shot

Now be careful because when you add vNICs or modify the storage of a Service Profile or an updating Service Profile Template it will power cycle the blade that is bound to the template. I don’t know if there is a way to change this behavior but I think this is dangerous.
After my ESX 4i server rebooted I first checked the vmnic list using the esxcfg-nics –l command. Here is the output
~ # esxcfg-nics -l
Name PCI Driver Link Speed Duplex MAC Address MTU Description
vmnic0 0000:08:00.00 enic Up 10000Mbps Full 00:25:b5:0c:95:af 1500 Cisco Systems Inc VIC Ethernet NIC
vmnic1 0000:09:00.00 enic Up 10000Mbps Full 00:25:b5:0c:95:bf 1500 Cisco Systems Inc VIC Ethernet NIC
vmnic2 0000:0a:00.00 enic Up 10000Mbps Full 00:25:b5:0c:95:ae 1500 Cisco Systems Inc VIC Ethernet NIC
vmnic3 0000:0b:00.00 enic Up 10000Mbps Full 00:25:b5:0c:95:be 1500 Cisco Systems Inc VIC Ethernet NIC
AWESOME!!!
Next I logged into my vSphere Client and checked the Network Adapters and added a new vSwitch for VM traffic.


Now I can keep my Management Network (Service Console) on a standard vSwitch and put my VM networks in a Distributed vSwitch or in Nexus 1000v without worrying about loosing access because a configuration error.
VMware vSphere vCenter Storage Alarms
One of the complaints of vCenter 2.x was the limited number of alarms that could be configured. With vCenter 4.x VMware addressed this by giving admins the ability to create alarms for just about any event on any object.
There are several alarms that are configured out of box and defined at the topmost vCenter server level.

One of the pre-configured alarms that seems to always be in a warnings state is the “Datastore usage on disk” alarm. 95% of the time this alarm is in a warning state because of the local VMFS data store that is required in ESX 4 for the Service Console OS to live in.
![]()
I still have yet to understand why VMware decided to put the COS in a VMDK. If anyone knows why this is beneficial I would love to here from you.
Anyway, back to the “Datastore usage on disk” alarm issue.
I have found that the following procedure is the best way to prevent this alarm on the local VMFS datastores.
- Go to the Home –>Inventory—>Datastores view in the vSphere Client
- Right-click on your datacenter and create two new folders, one named LOCAL-COS-DATASTORES and one named SAN-DATASTORES.
- Drag and drop the local VMFS datastores into the LOCAL-COS-DATASTORES folder and the SAN datastores into the SAN-DATASTORES folder.
- Go to the alarm definition for “Datastore usage on disk” and disable it by clearing the Enable this alarm box.

- Create a new alarm at the LOCAL-COS-DATASTORES level named “Datastore usage on LOCAL Disks”.
- Configure the “Datastore usage on LOCAL Disks” trigger to alarm a warning at 90% and alert at 95%.

- Create a new alarm at the SAN-DATASTORES level named “Datastore usage on SAN Disks”.
- Configure the “Datastore usage on SAN Disks” trigger to alarm a warning at 70% and alert at 85%.


Now you should have a lot fewer datastore warning alarms.
Using vSphere Host Profiles with 10G and CNA Adapters
I am currently working on a VMware vSphere project that is being built on Cisco UCS blades. The UCS blades have a single dual port CNA that acts as both an HBA and a 10G NIC.
When we tried to apply the host profile built from our reference blade we got this error message “Error during the configuration of the host: Invalid argument: Invalid argument”.
The host profiles log “pyVmomiserver.log” didn’t have any useful information and we couldn’t find anything on the web so opened a case with VMware support.
It turns out this is a known issue with 10G adapters and will be fixed in ESX 4 Update 1. The issue is that the host profile tries to set the speed/duplex of the NIC to auto but since auto isn’t an option for 10G adapters it fails.
To workaround this issue you can edit the host profile and set the NIC speed and duplex to 10000 and full. After we set the NIC speed and duplex the host profile successfully applied to the other hosts.

Automating ESX 4 Installs with the Ultimate Deployment Appliance
In preparation for a vSphere 4 upgrade project I was researching the best way to automate the ESX 4 builds. Even though this is an upgrade project from vCenter 2.5 and ESX 3.5 we have found it best to rebuild the hosts instead of upgrading them. The upgrades take longer and are not as clean as fresh installs.
With ESX 3.x for our larger clients we had used a third part tool called VPloyment from Repton. It seams that Repton is no longer around I was unable to find any information on VPloyment support for ESX 4.
Since VPloyment was not an option my first thought was to script the install using a kickstart script so did some research and found out that the install options set during a manual install of ESX 4 are in a kickstart script that is saved to /root/ks.cfg. I considered putting a kickstart script on a floppy disk image or USB key and then mounting the ESX ISO with the Dell DRAC to perform the automated install. I decided against this route because it wasn’t very efficient and I would have to have a different script for every server.
The other goal I wanted to achieve was to provide a better way around preventing the installer from wiping all the VMFS LUNs that the host is connected. For manual installs we pule the fiber cables or removing the LUNs from the host before the rebuild. With this automated approach I wanted to find a more efficient option.
Enter Mike Laverick and the Ultimate Deployment Appliance (UDA). I had heard about UDA a couple years ago but never took the time to try it out because we started using VPloyment and 90% of the ESX installs I do are less than 5 hosts.
I downloaded UDA 2 from http://www.ultimatedeployment.org/uda20beta.html and using Mike Laverick’s excellent guide http://www.rtfm-ed.co.uk/?page_id=366 I tested it out using VMware Workstation for the UDA and my test ESX 4 host.
Within 30 minutes I had configured UDA and performed an automated install of ESX 4.
One of the coolest features of UDA 2 are the subtemplates that let you create your own variables for things like hostnames and IP addresses. These allow you to have one kickstart script file for any number of hosts.
Here is a short video of an install of ESX 4 in a VMware Workstation VM.
Terminal Server/XenApp vs VDI
There is a lot of hype these days around VDI and it seems like every week there is some new VDI related product or company being announced. With all of these options available how is company ever to decide on which VDI solution to go with?
In my opinion you should first decide on whether or not you want to go with Terminal Services/XenApp or VDI. Both technologies offer the same advantages and feature sets but Terminal Services/XenApp has a much cheaper per user cost and is a proven solution that has been around for 12 years. VDI is cool, hip and is in all of the industry news but it is very young and still evolving.
In my opinion VDI is for special use cases and for applications that will not run in Terminal Services.
Brian Madden did a great session on this at VMworld Europe 2009.
Any company currently looking at VDI should watch this session and first decide if Terminal Services would work for them. If so you can save a lot of money in infrastructure costs by using Terminal Services/XenApp.

You must be logged in to post a comment.